pzrwest
Brigade Commander
If you have ever broken the ankle joint on a DML figure trying to put on boots, here is my solution to repairing the ankle joint.
1 carefully split the calf and remove it from the knee joint
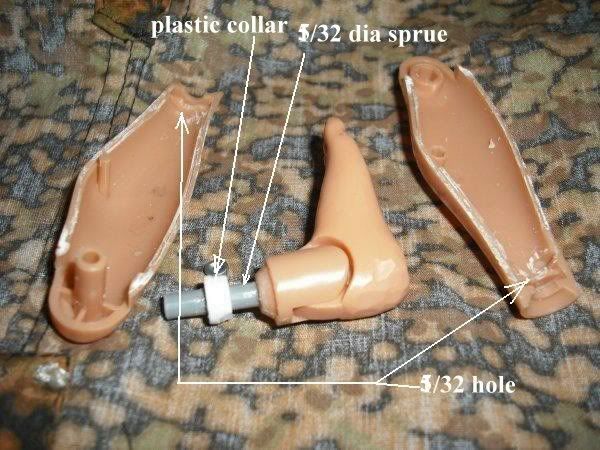
2 hold the 2 halves together and take a 5/32" drill bit and dill out the hole as shown in the 1st pic
3 carefully drill out the end of the ankle with the 5/32 bit and insert a 1" section of plastic sprue or styrene rod into the ankle joint with proweld or other styrene glue, or if you are very carefull cyano.
4 make a disc of styrene and drill a 5/32" hole in the center and slide it over the 1" peg you made for the ankle.
5 lay the new ankle pin as we will now call it onto one half of the calf and slide the collar down as shown in pic 1.
6 carefully lift the ankle from the calf and glue the collar to the peg being carefull not to move the collar.
7 let the glue set completely
Pic1
Assembly
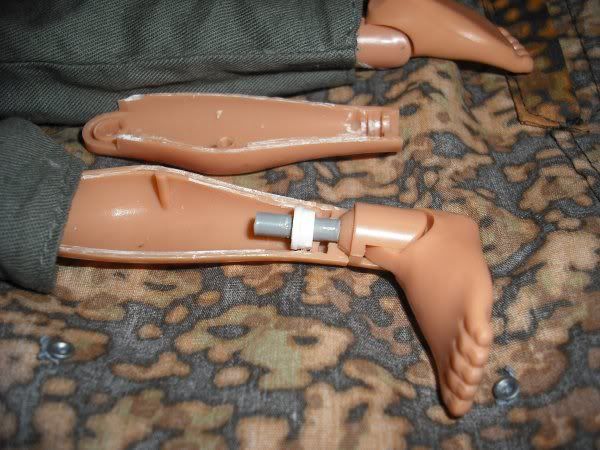
Now the new ankle peg is fully set(cured) lay it back into the calf half as shown in pic2.
Pic2
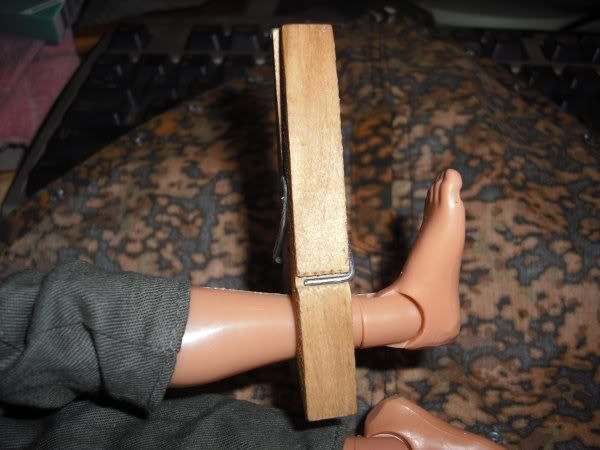
Then re-assemble the calf with the foot attached and caefully re-glue the calf seam clamp and alow the glue to set. Here is the leg re-assembled and clamped
Pic3
When the glue is set remove the clamp and now you have a figure with a fully function ankle joint again.Hope this is helpfull
1 carefully split the calf and remove it from the knee joint
2 hold the 2 halves together and take a 5/32" drill bit and dill out the hole as shown in the 1st pic
3 carefully drill out the end of the ankle with the 5/32 bit and insert a 1" section of plastic sprue or styrene rod into the ankle joint with proweld or other styrene glue, or if you are very carefull cyano.
4 make a disc of styrene and drill a 5/32" hole in the center and slide it over the 1" peg you made for the ankle.
5 lay the new ankle pin as we will now call it onto one half of the calf and slide the collar down as shown in pic 1.
6 carefully lift the ankle from the calf and glue the collar to the peg being carefull not to move the collar.
7 let the glue set completely
Pic1
Assembly
Now the new ankle peg is fully set(cured) lay it back into the calf half as shown in pic2.
Pic2
Then re-assemble the calf with the foot attached and caefully re-glue the calf seam clamp and alow the glue to set. Here is the leg re-assembled and clamped
Pic3
When the glue is set remove the clamp and now you have a figure with a fully function ankle joint again.Hope this is helpfull