• Pardon the dust while the boys rebuild the site.

    The board will be in a state of disarray as I get things sorted out, for a little while at least.

    The new incarnation is using Xenforo as the system software. It is much like what we are used to, with a few differences. I will see about making a FAQ to help point out the differences for the members.


    One IMPORTANT difference for all of us old timers is that the 'mail' system is replaced with what are called 'conversations'/

    There is no 'Inbox' or 'Out box' or 'Sent' folders anymore.

    Think of Conversations as private 'threads' or topics that don't exist in a forum, that you start with another member. NOTE: Conversations can include more than one member if you or someone else in the conversaion, likes.
    Takes a little getting used to but I am sure you all can get a hang of it.


    Only a slightly modified default default Xenforo style is available for now. Once the new SAG style is ready it will be available.

    All existing users should be able to login with their usernames and passwords once the site goes up.


    If anyone has difficulties logging in please contact me at sixthvanguard@gmail.com.


    Thank you for your support and patience. I know it has been a loooong road.

1/6th Scale Mountaineering

Heeresbergführer

Company Commander
Servus Bergkameraden,

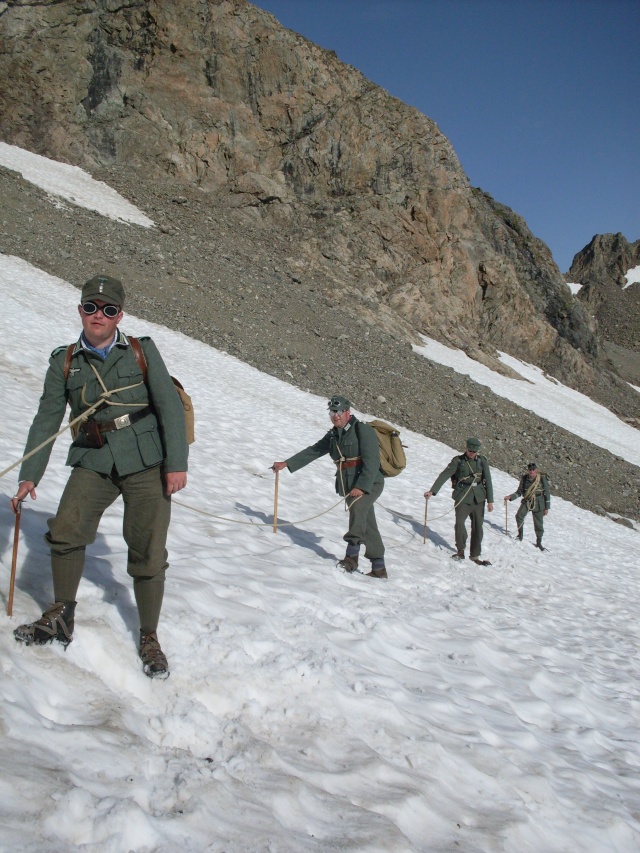
There have been many great mountain troop figures posted on this and other forums. And, of course, the best way to display a mountain trooper is in his element...the mountains.

ProjEdel_009.jpg
H_HochGebSchu_006w.jpg


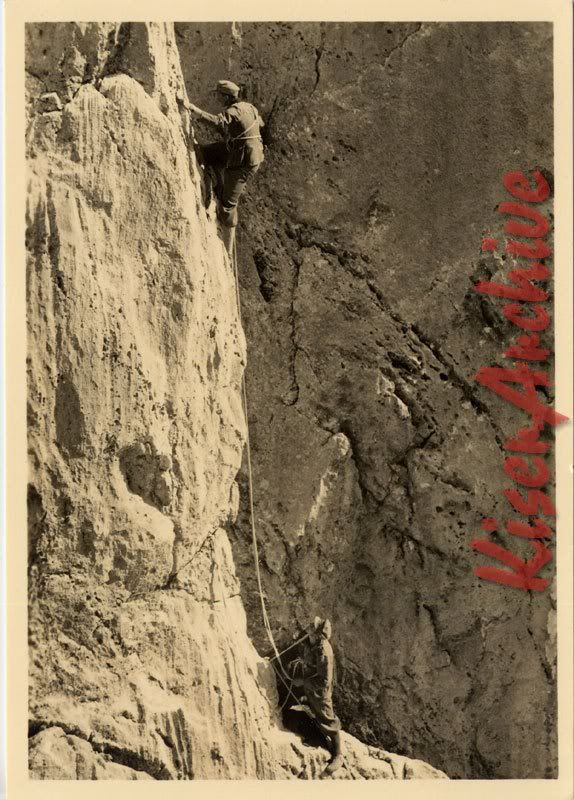
But unless you have some experience with rock climbing or mountaineering, trying to pose a figure with proper ropes, knots, and equipment can be daunting...and if not done correctly, you might end up with a figure tied up in bondage! :o

hoch4bedford04rw6.jpg


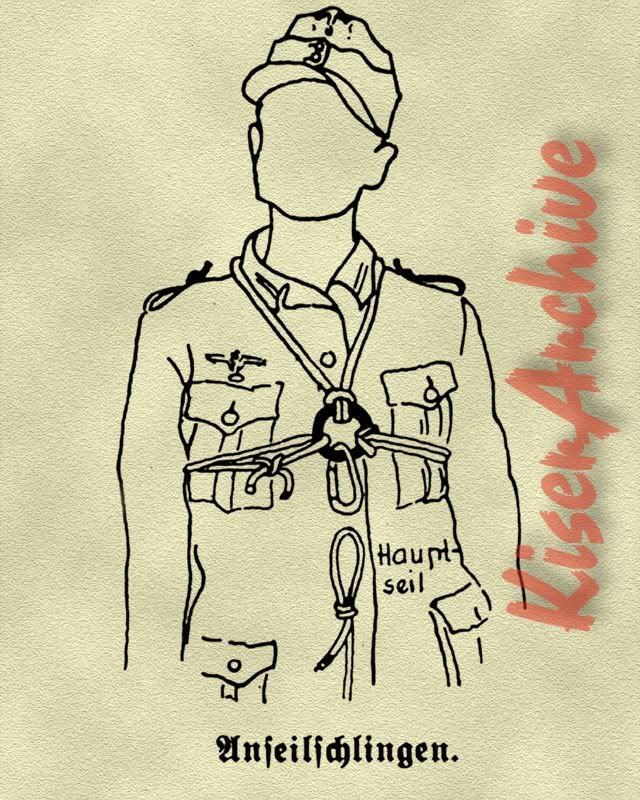
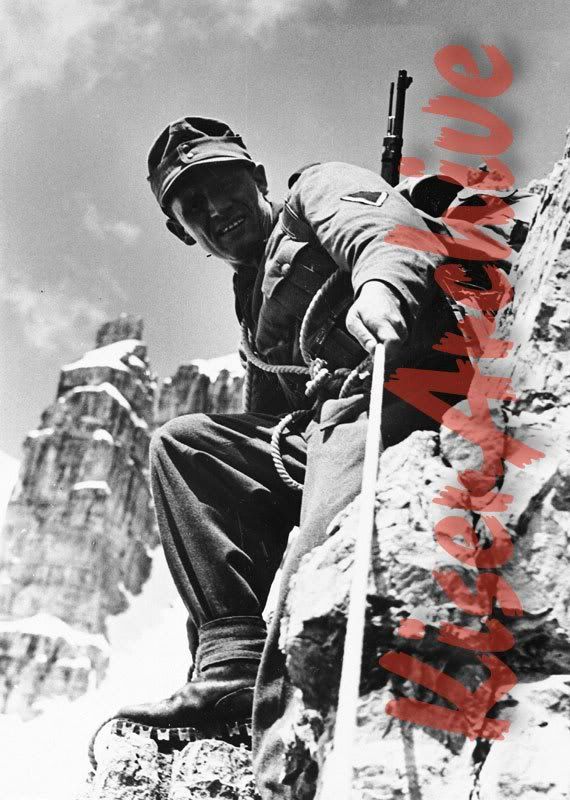
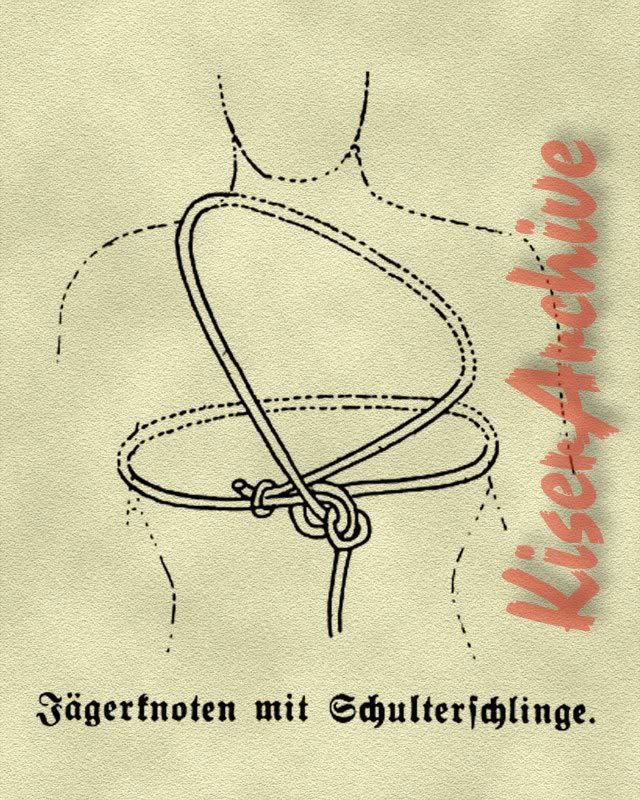
In this tutorial, we'll start off with a standard way of tying into a rope for rock climbing used by the German Gebirgsjägers...though this is a fairly standard technique used in mountaineering until the 1950's. This can be used with a 2-man roped climbing team...climbing vertical rock, or by a 3-man roped team when crossing snow fields and glaciers. This is called a "Jägerknoten mit Schulterschlinge" (bowline knot with shoulder sling).

ProjEdel_003.jpg
ProjEdel_001.jpg


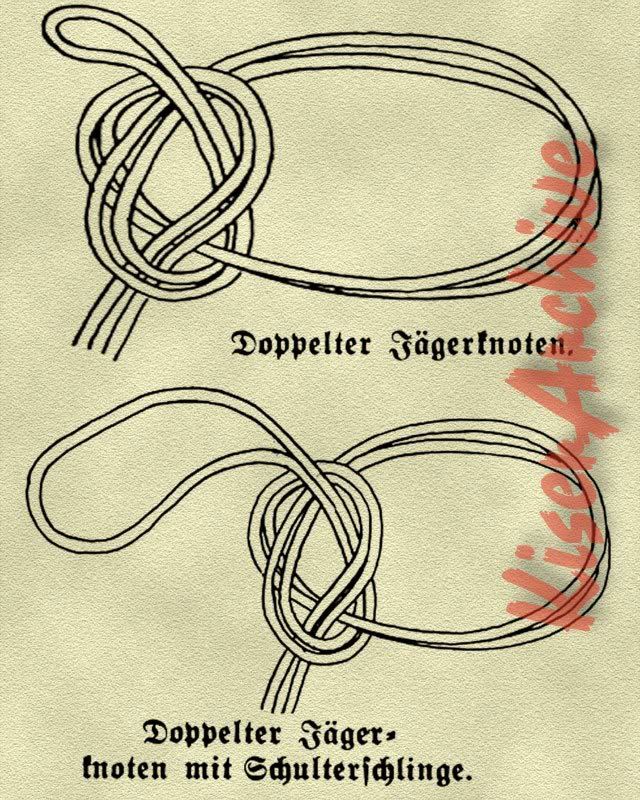
The double Jägerknoten is used to tie into the middle of the rope when used for a 3-man team.

ProjEdel_002.jpg


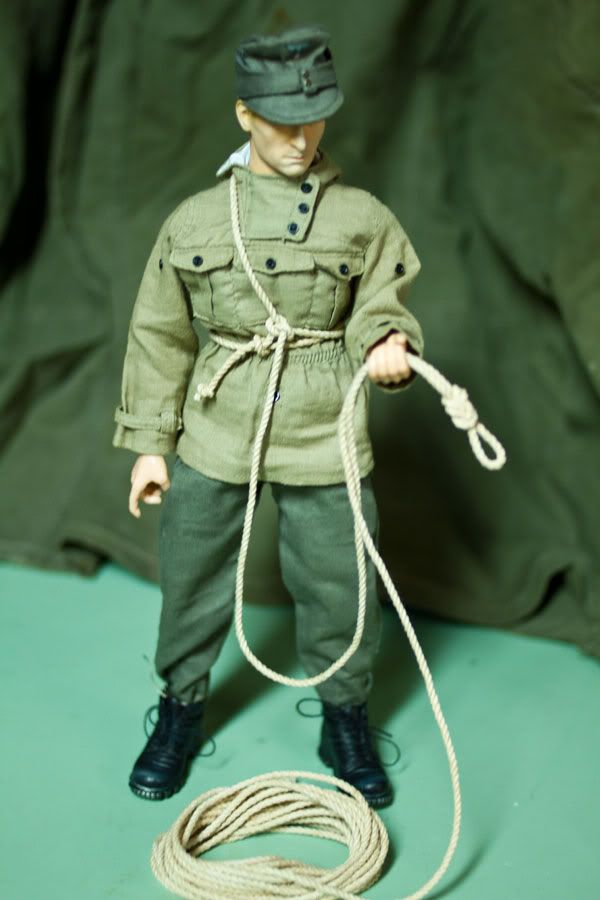
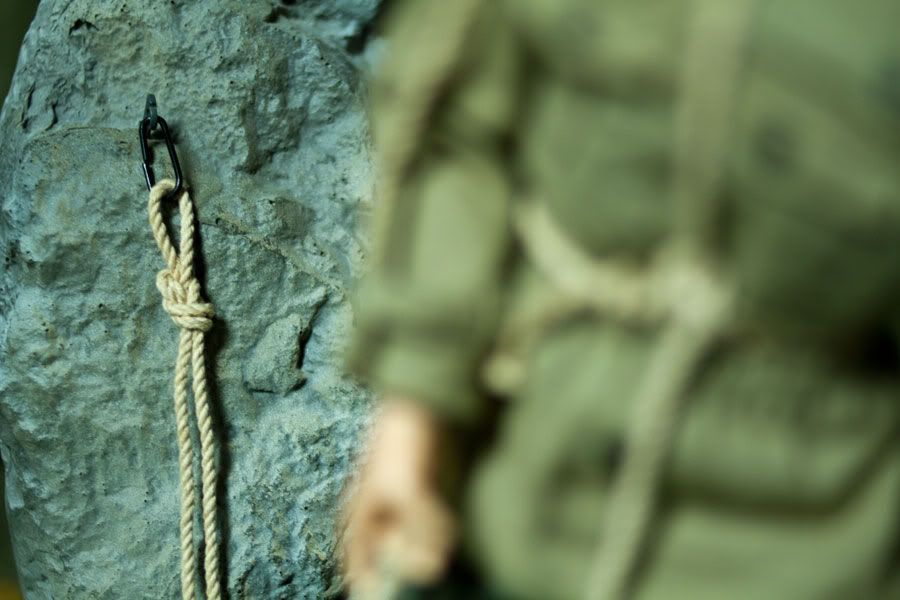
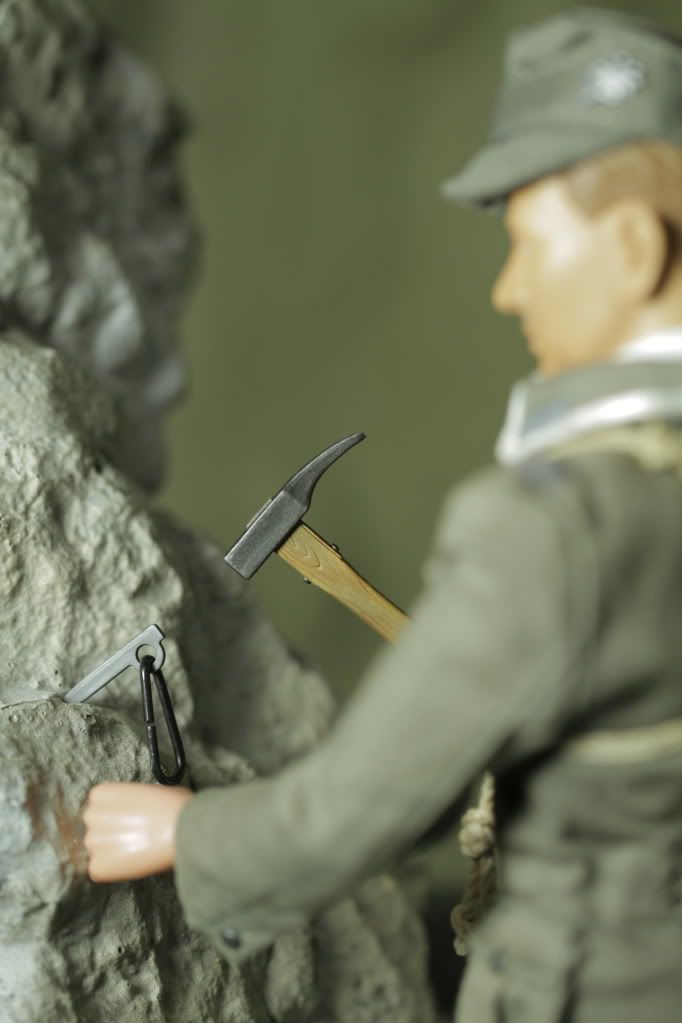
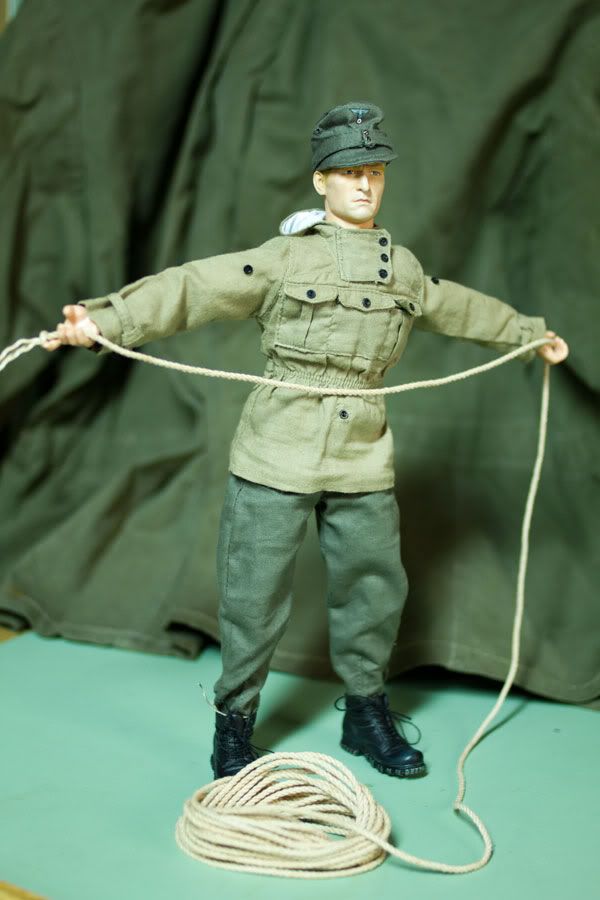
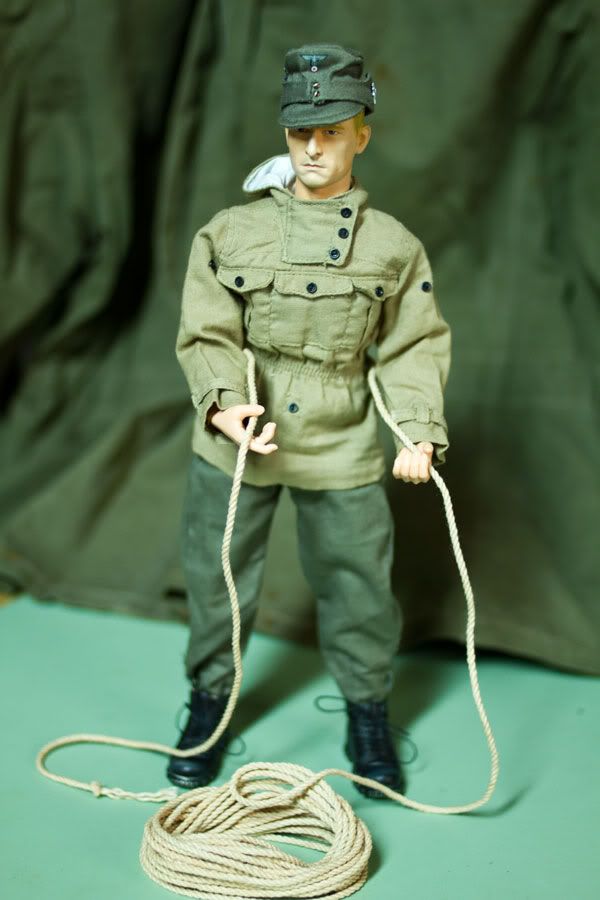
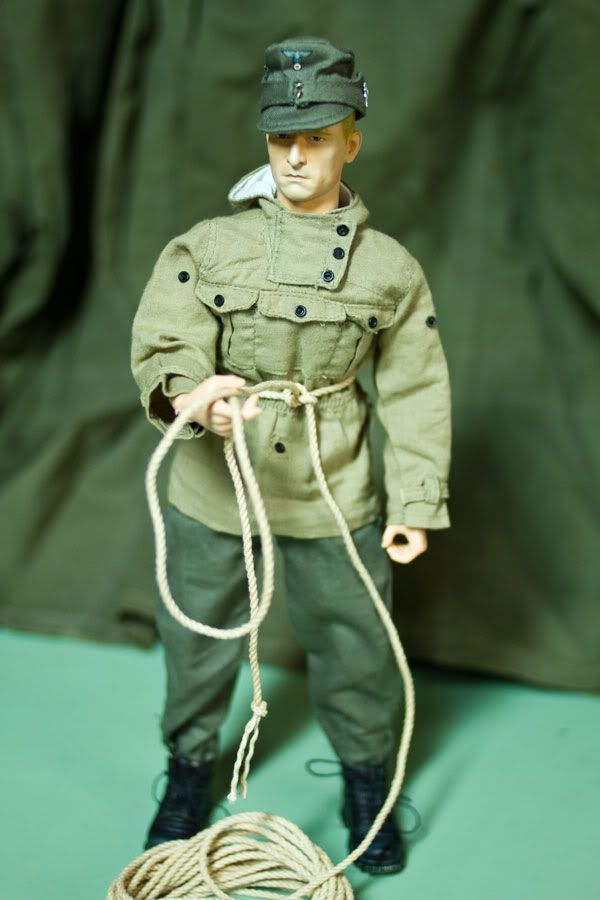
For 1/6th scale climbing rope, I have found that twisted cotton string dyed in tea makes the best. A standard period climbing rope was 10-12mm in diameter and 30-40 meters in length.

stringuw2.jpg
6thropebe0.jpg


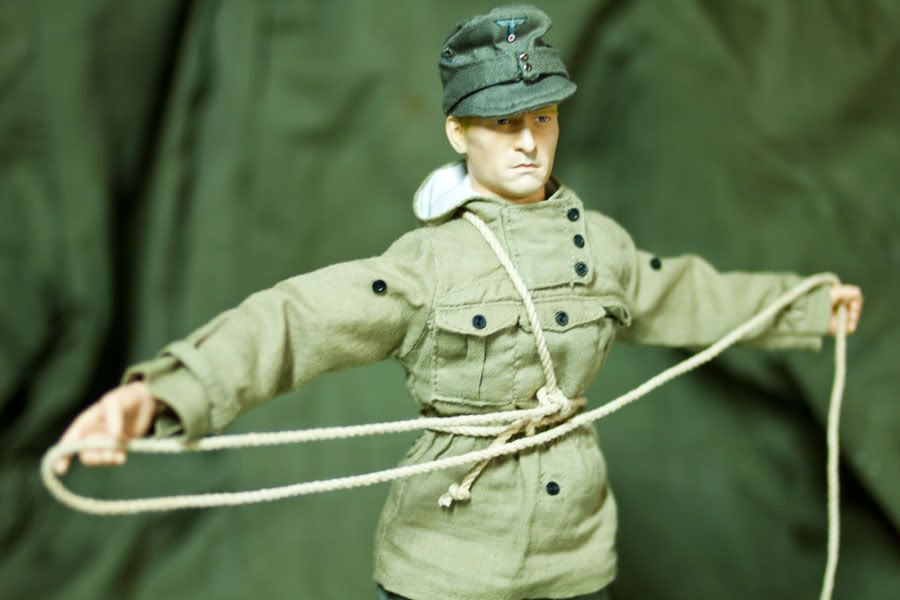
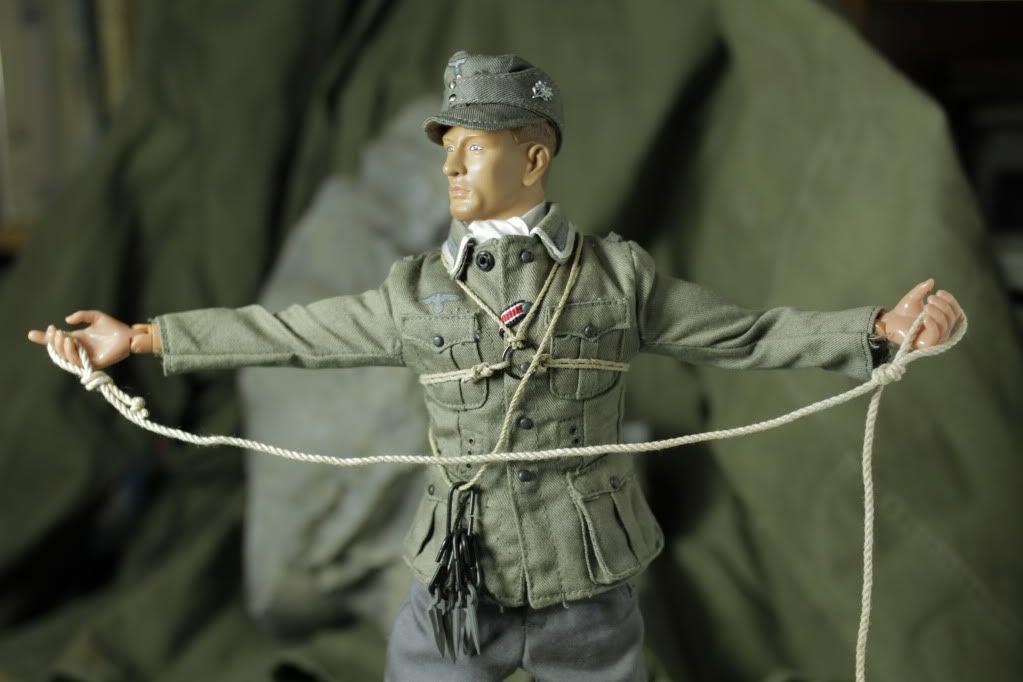
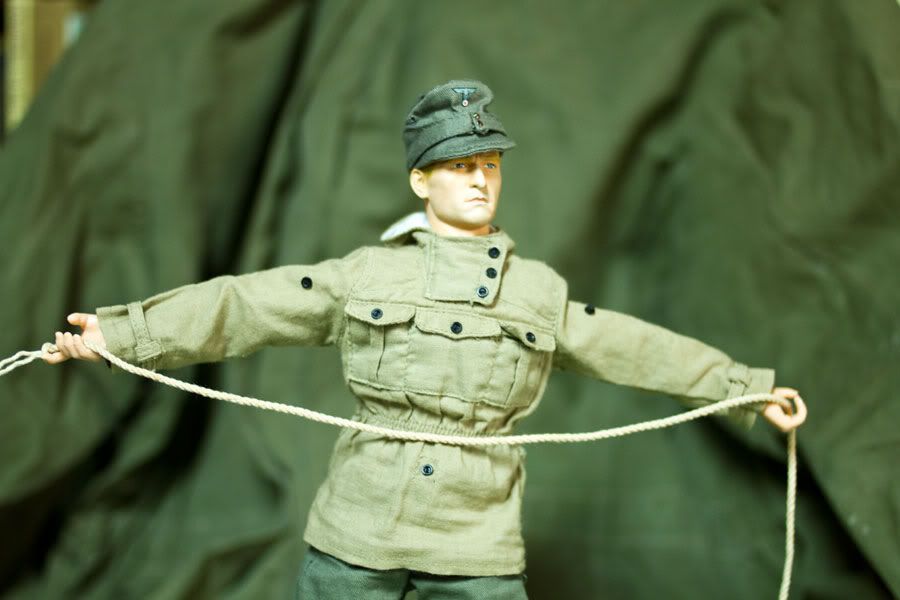
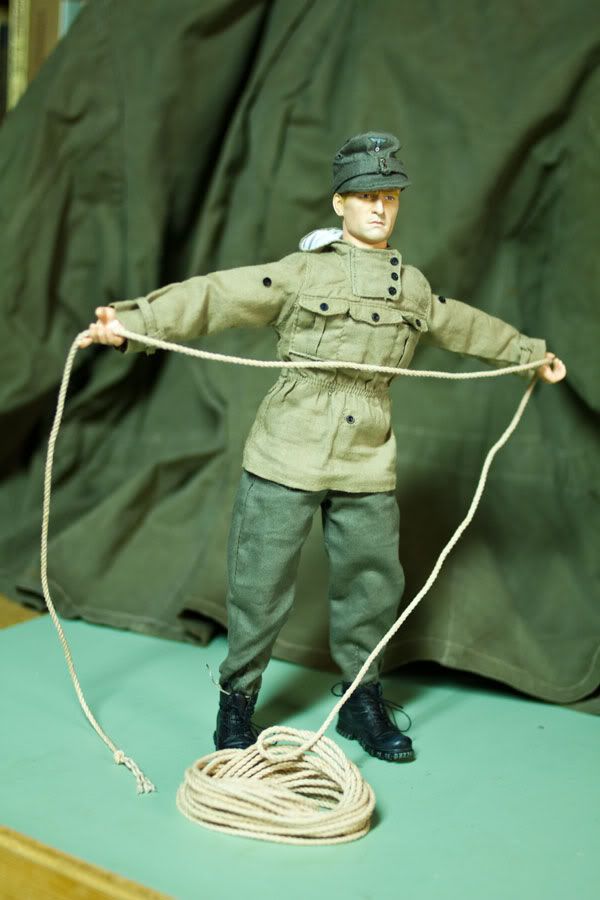
Now let's try this in 1/6th scale...first take your scale rope and draw out two arm span lengths that will be needed to make the "Jägerknoten mit Schulterschlinge."

GJ-ropes_MG_0181.jpg


GJ-Ropes_MG_0179.jpg


GJ-Ropes_MG_0182.jpg


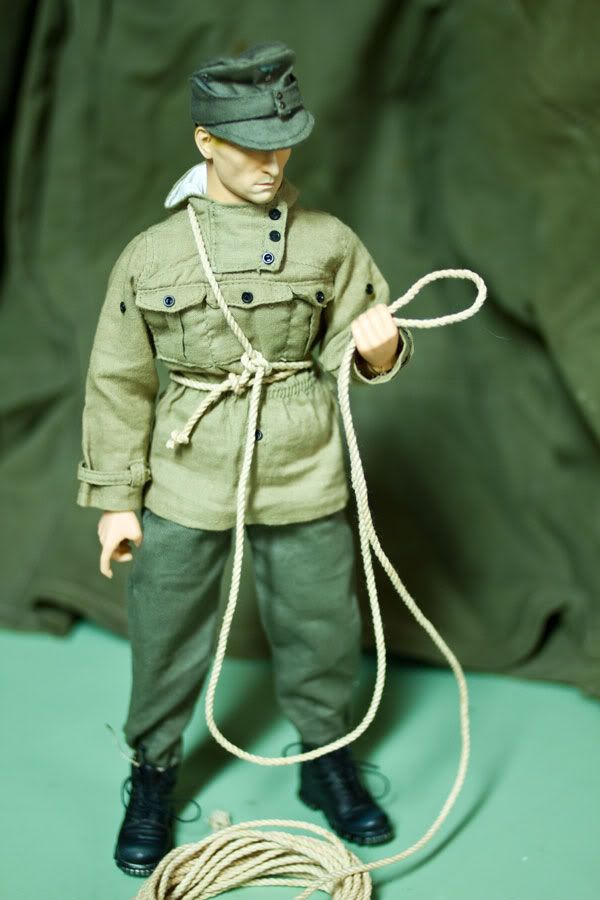
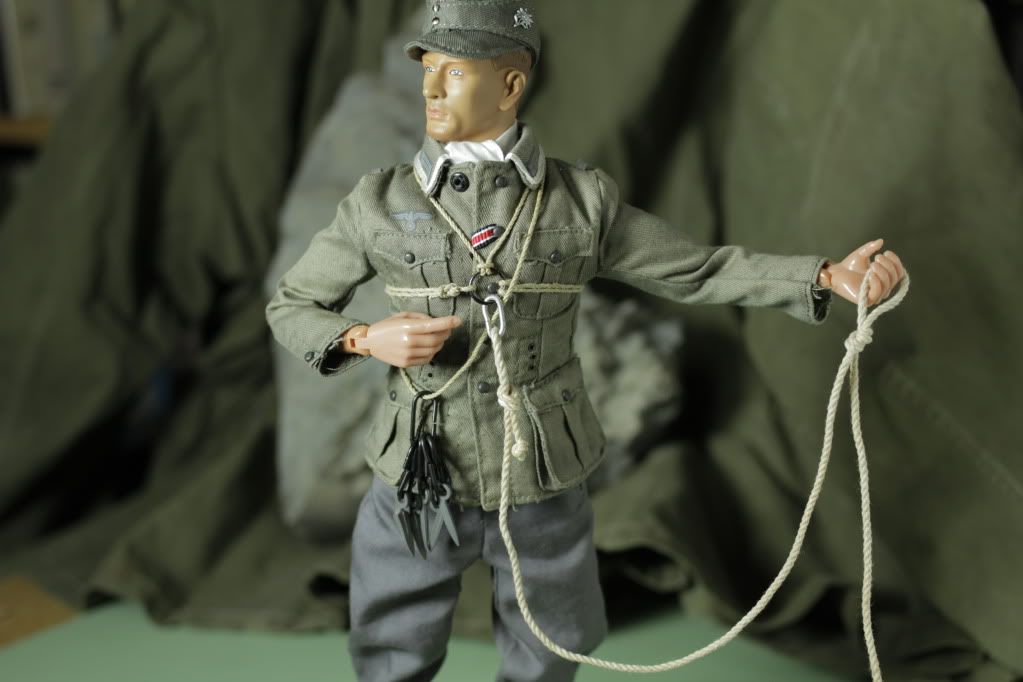
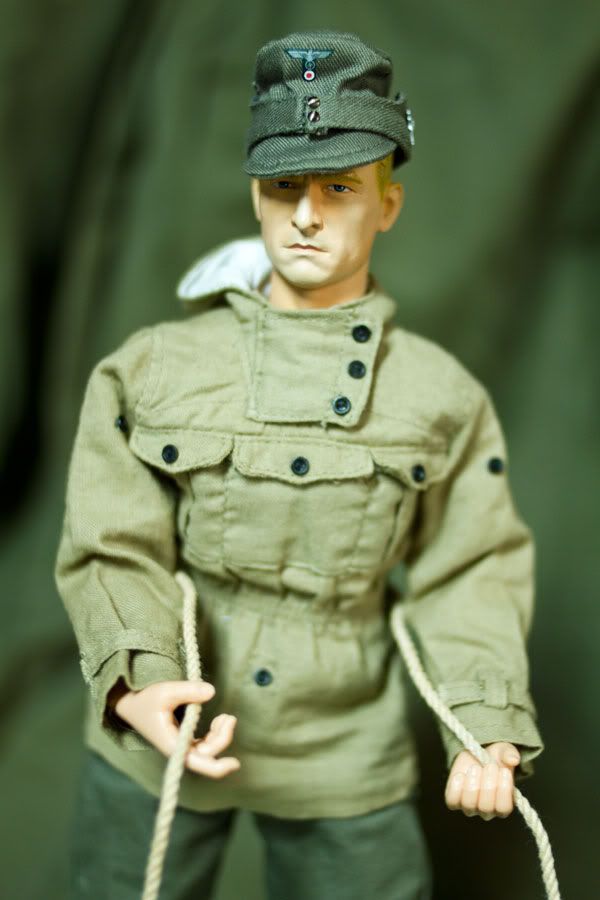
Take the rope and bring it around the figure's waist.

GJ-Ropes_MG_0183.jpg


GJ-Ropes_MG_0184.jpg


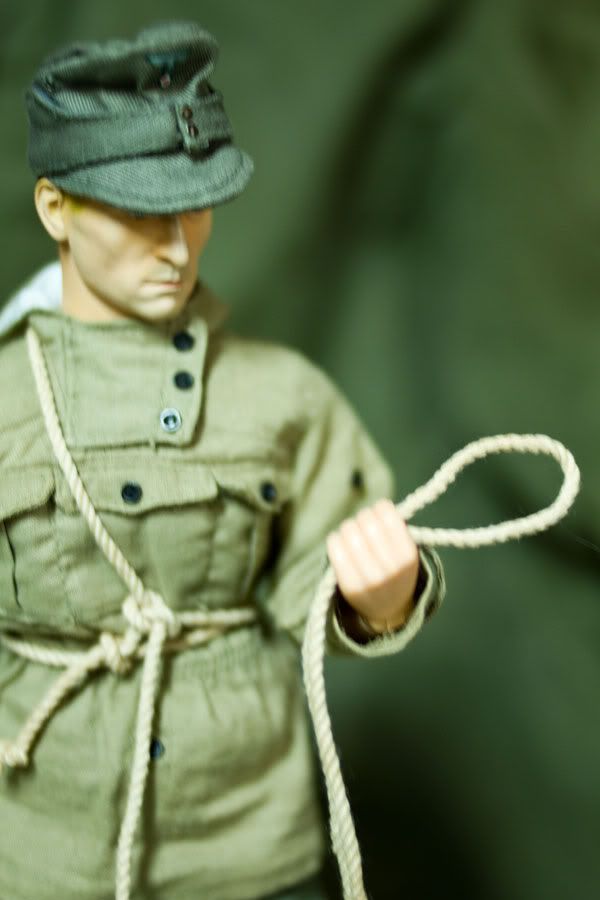
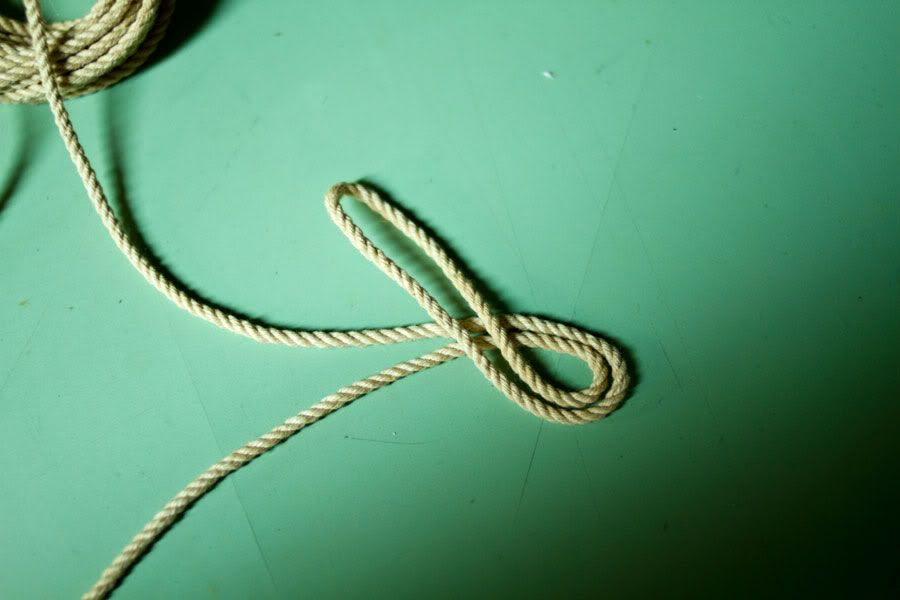
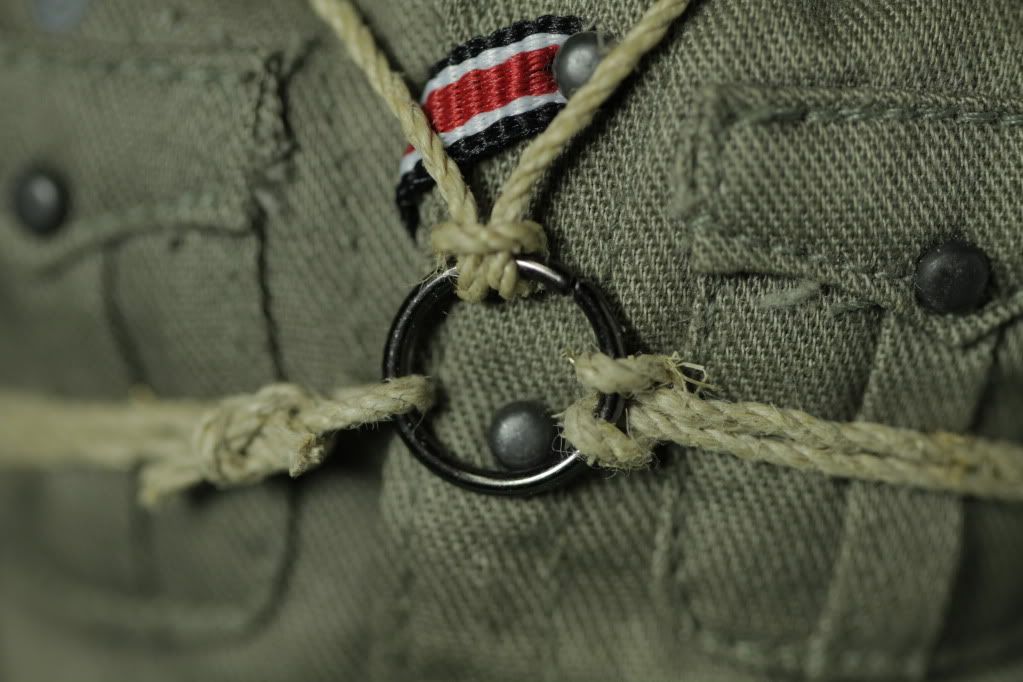
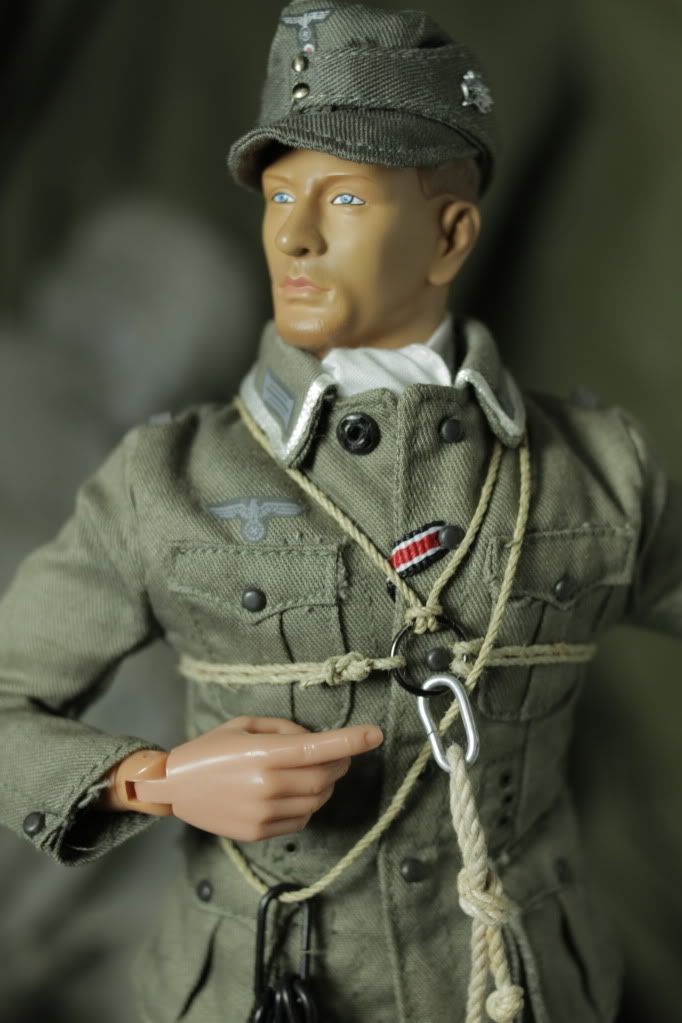
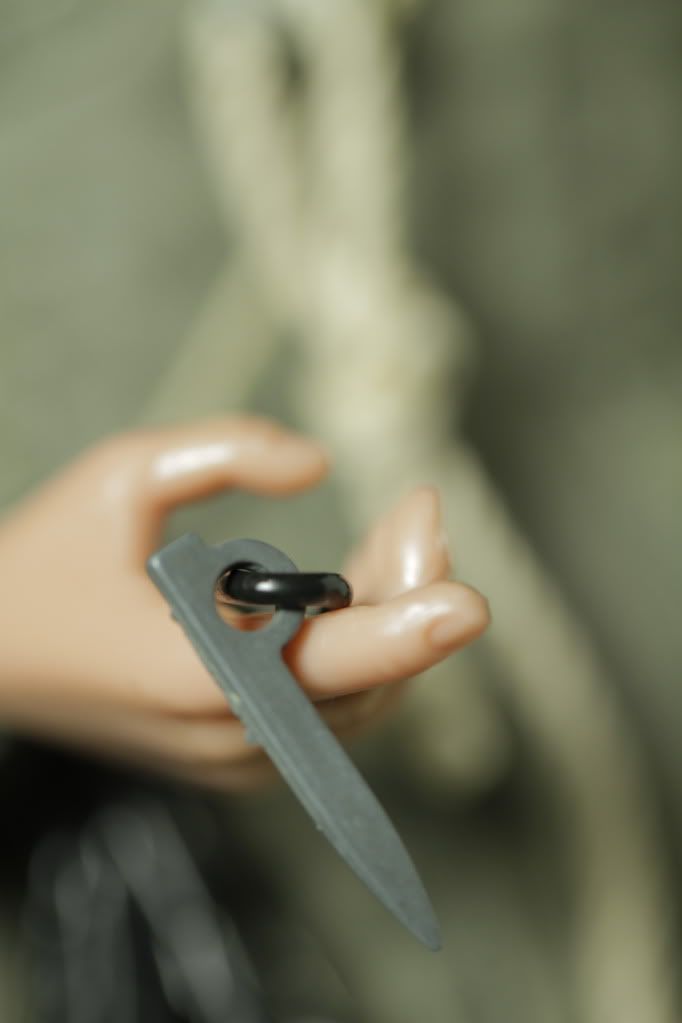
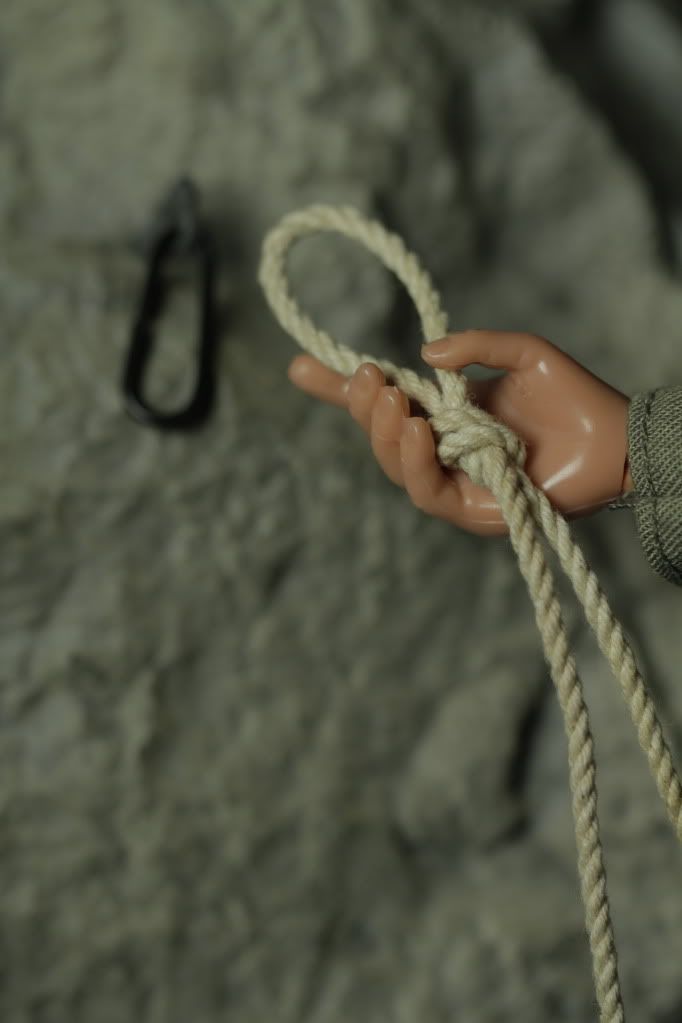
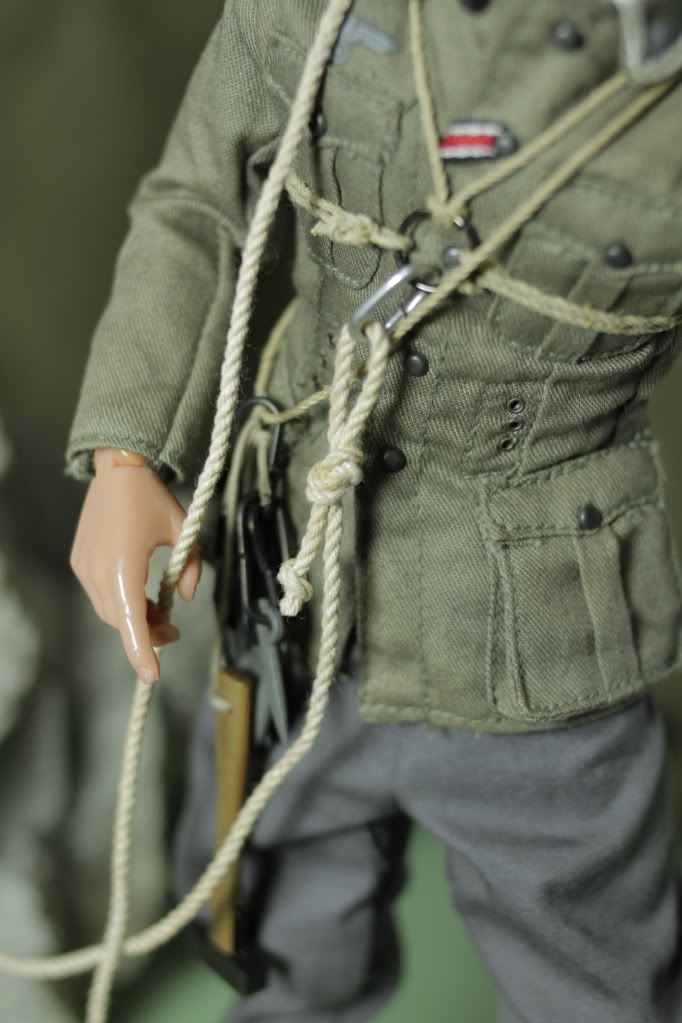
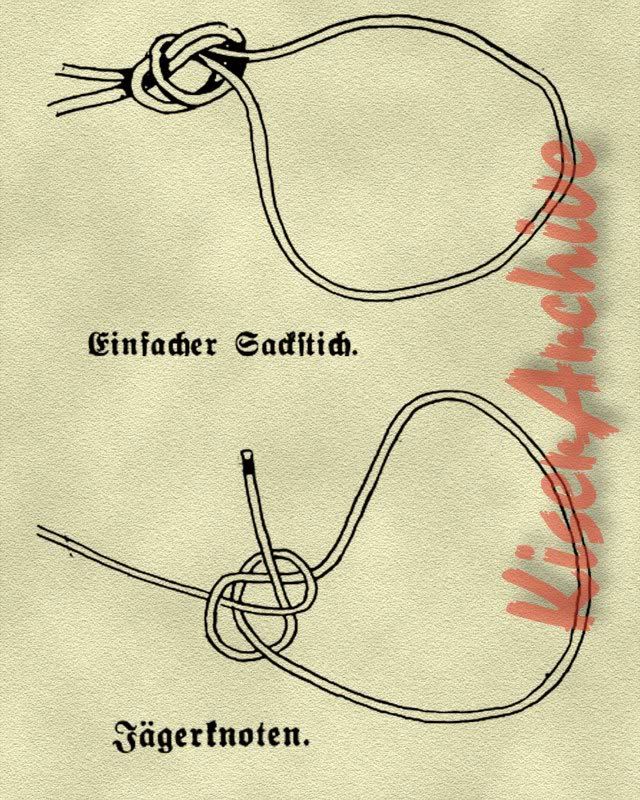
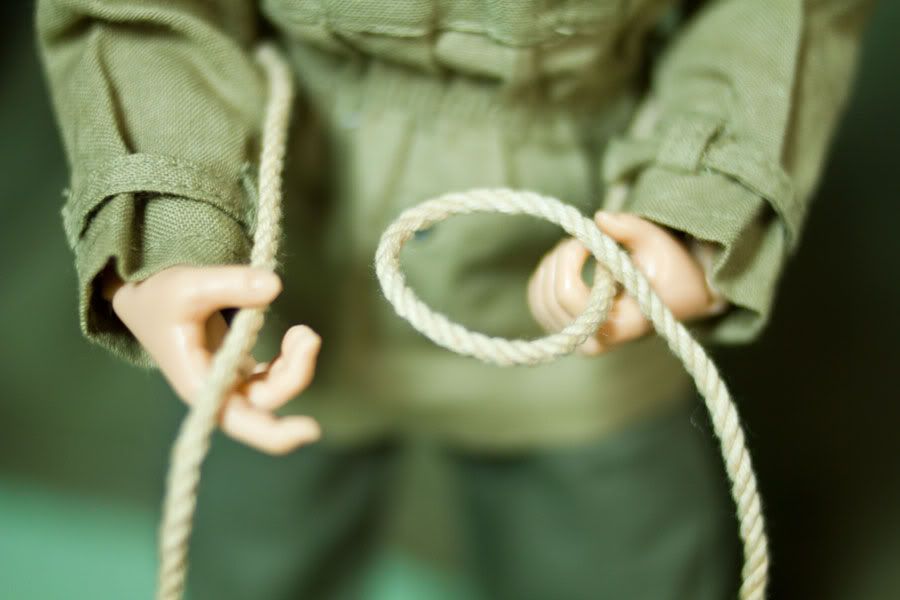
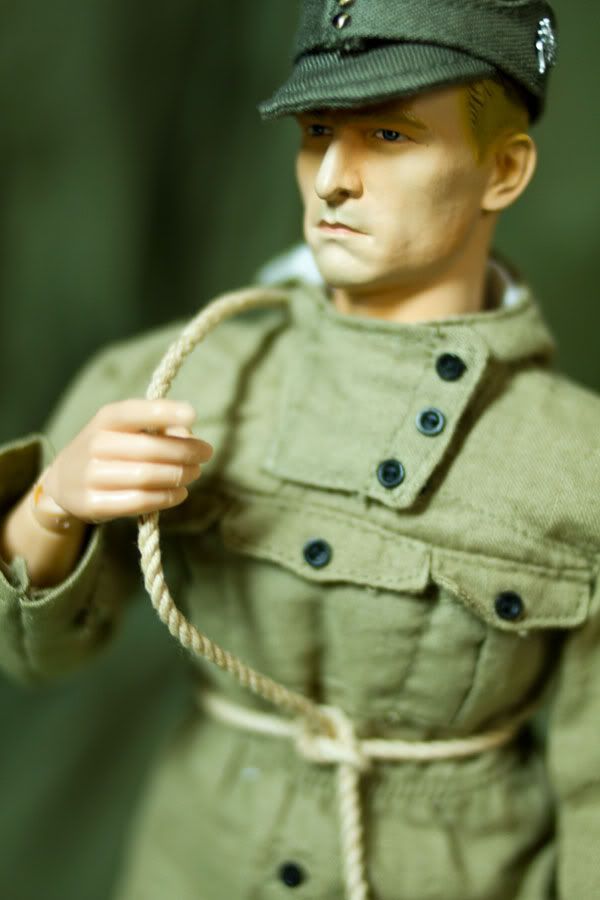
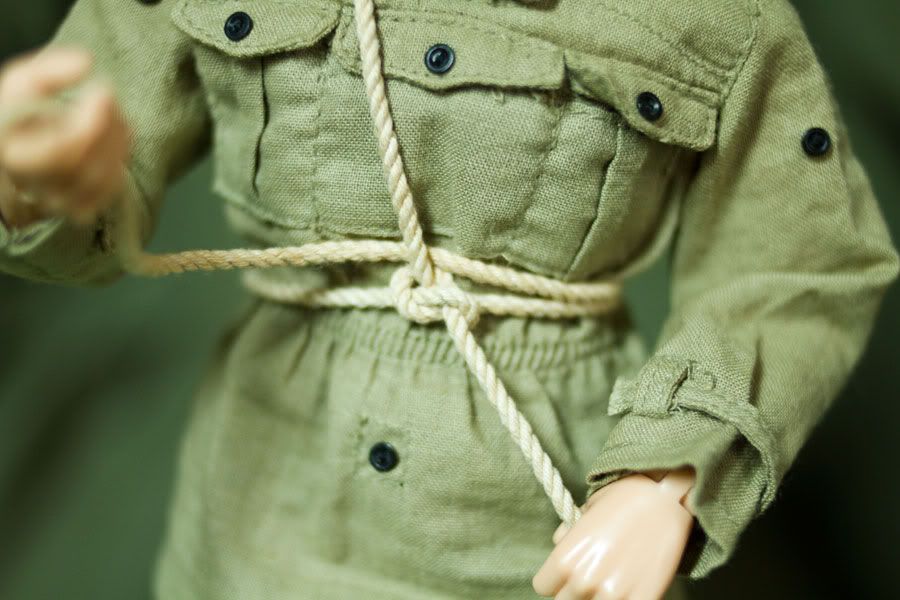
To tie the "Jägerknoten," first make a loop on the portion of the rope that goes to the main bulk of the climbing rope.
GJ-Ropes_MG_0186.jpg


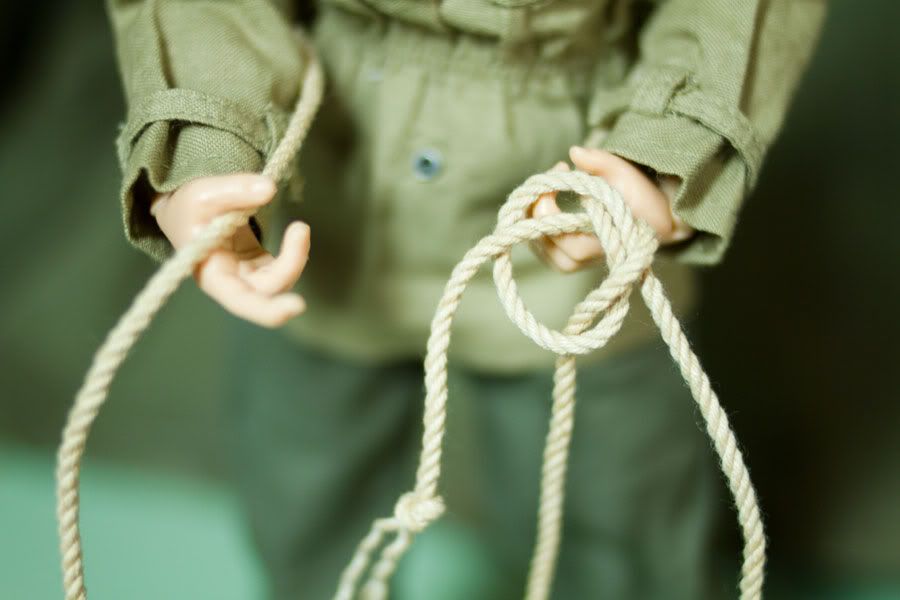
Now take the end of the rope...the rabbit...and bring it out hole, around the tree, and back through the hole...old boy scout trick to remember how to tie this! :!:
GJ-Ropes_MG_0187.jpg


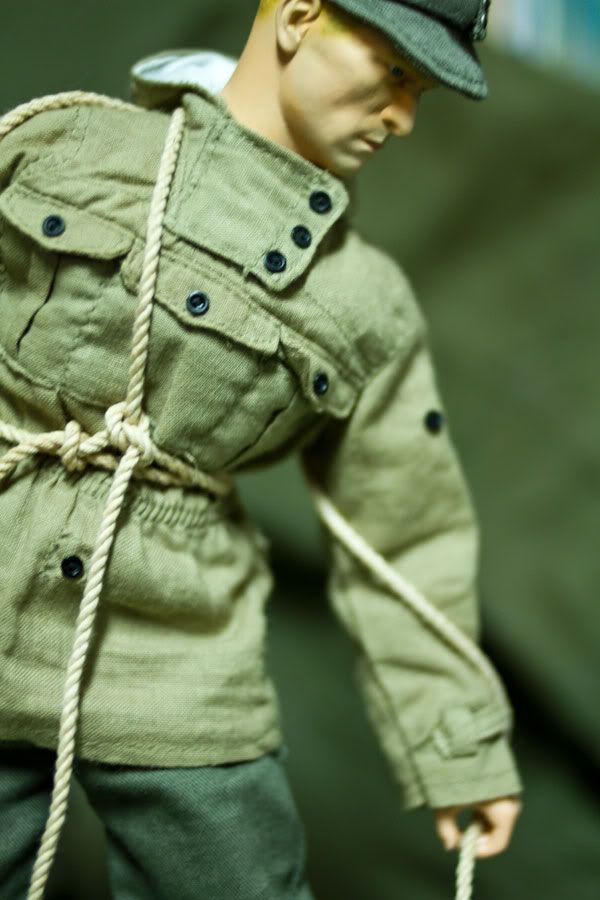
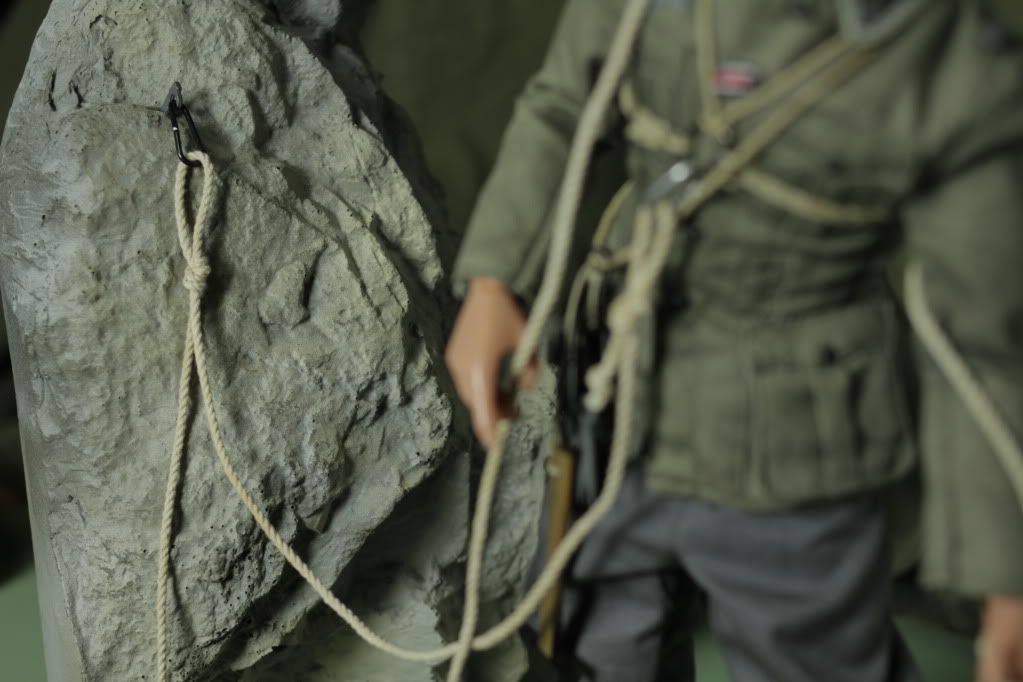
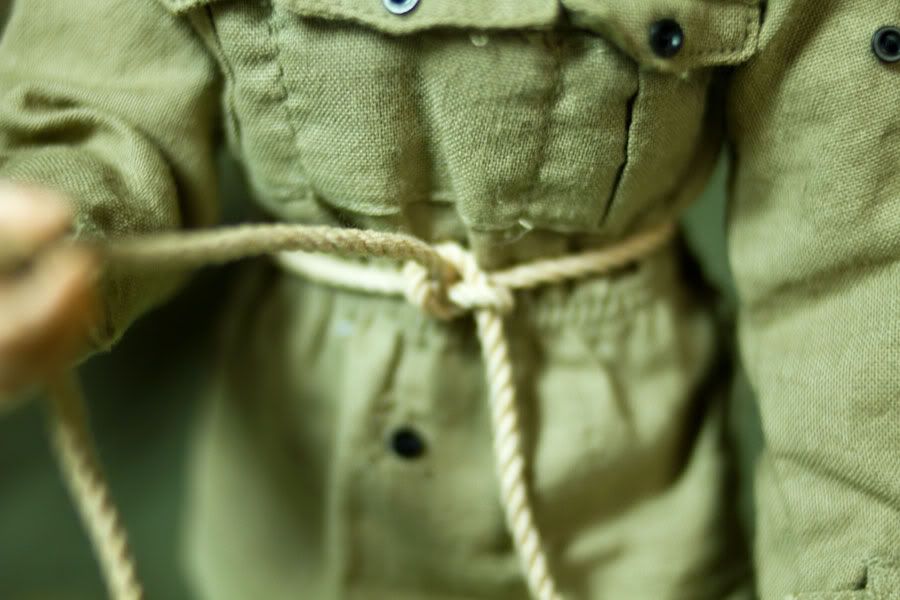
Tighten up the knot around the waist.

GJ-Ropes_MG_0188.jpg


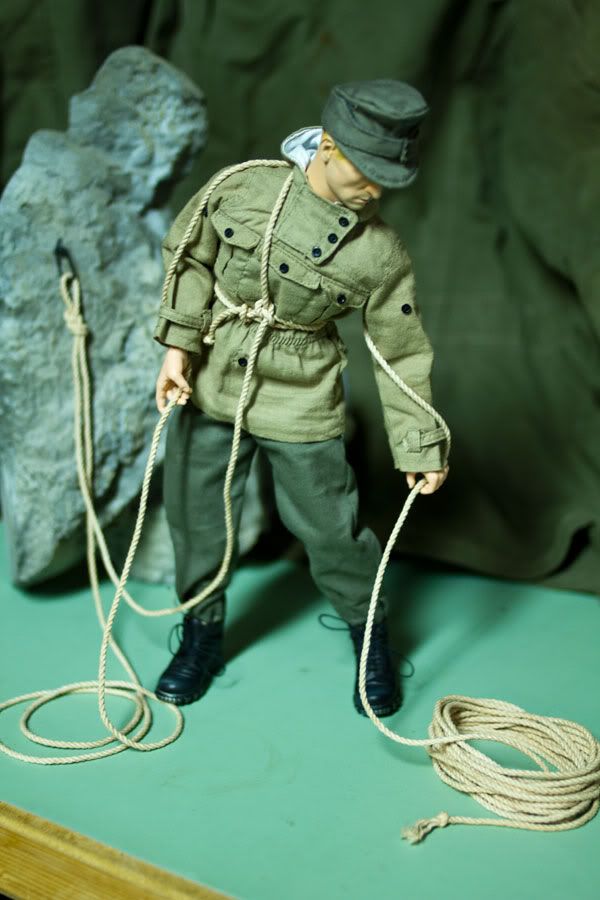
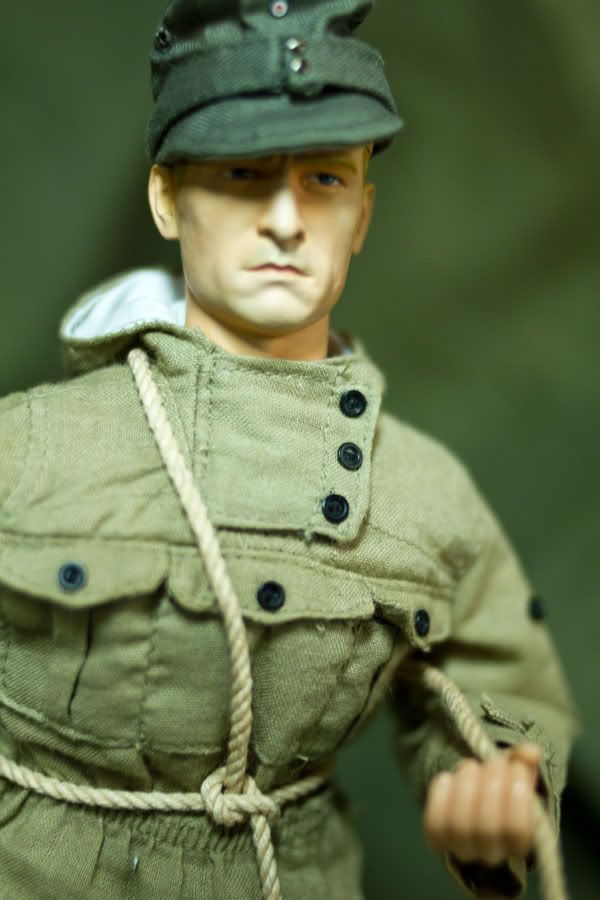
Gather up the loose end of the rope.

GJ-Ropes_MG_0189.jpg


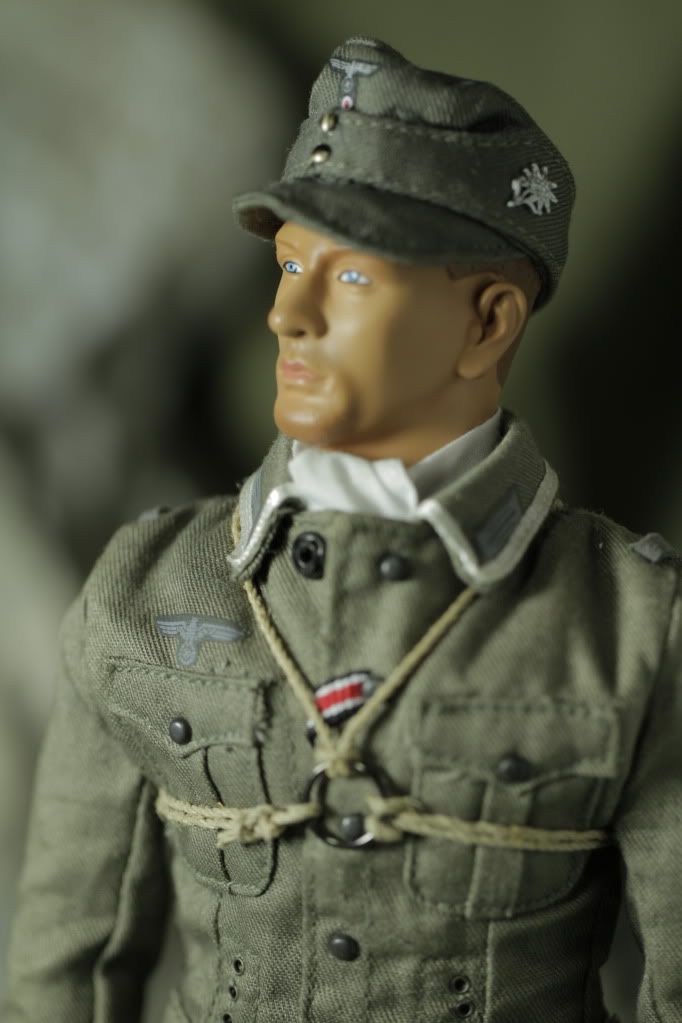
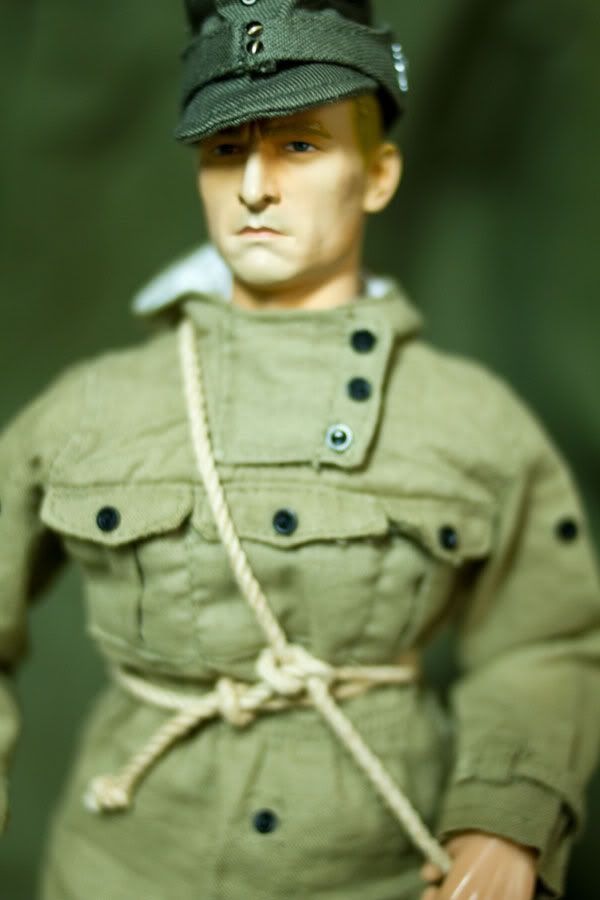
Bring the end of the rope over the right shoulder...

GJ-Ropes_MG_0190.jpg


and under the left arm.
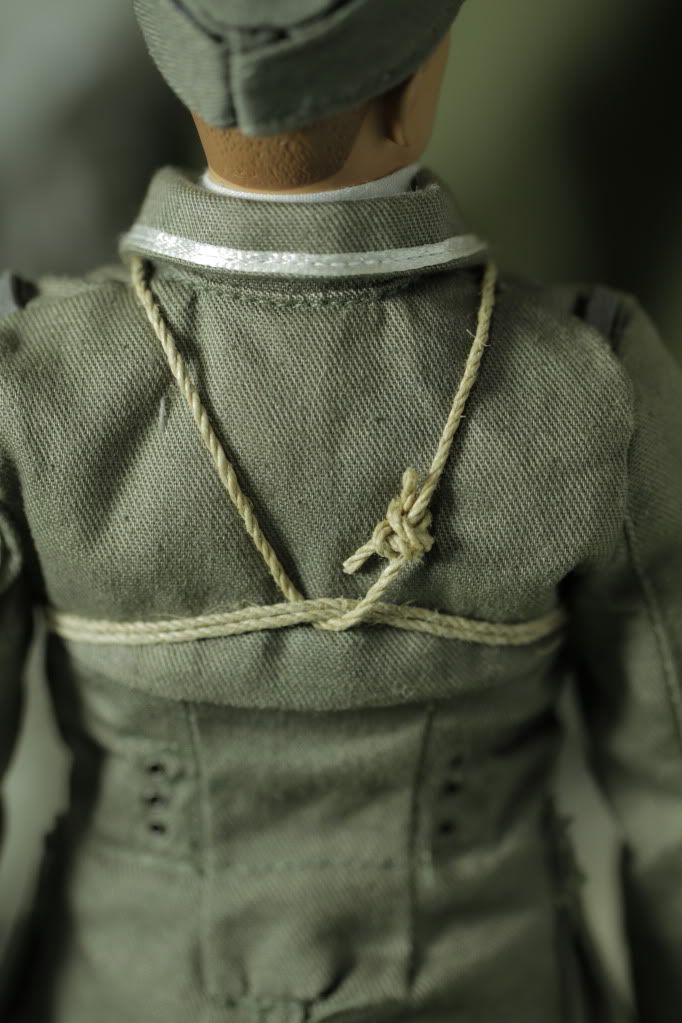
GJ-Ropes_MG_0192.jpg


View of the back.

GJ-Ropes_MG_0193.jpg


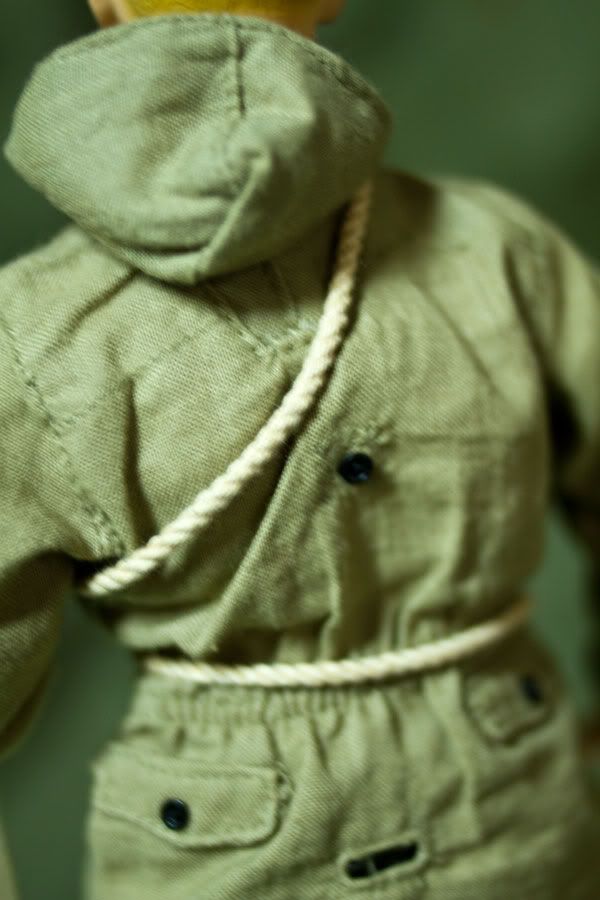
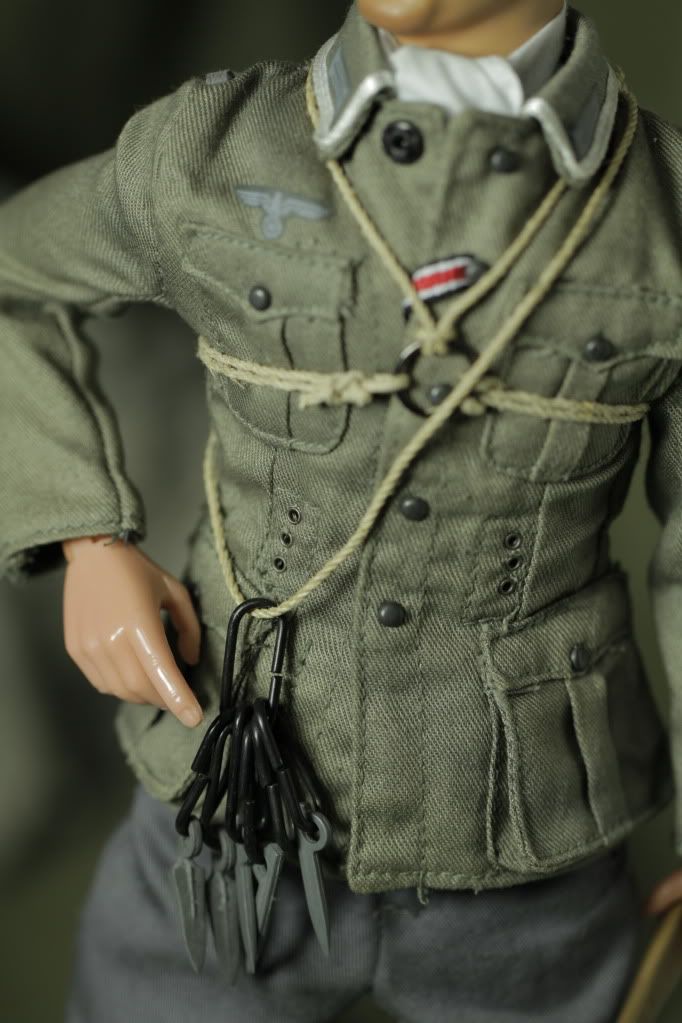
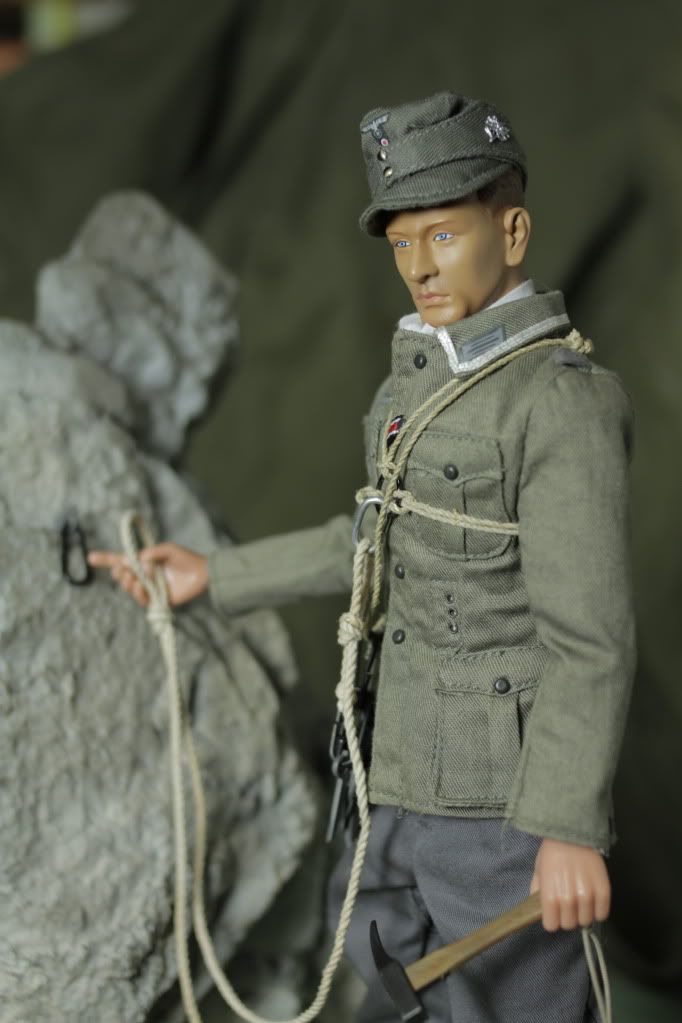
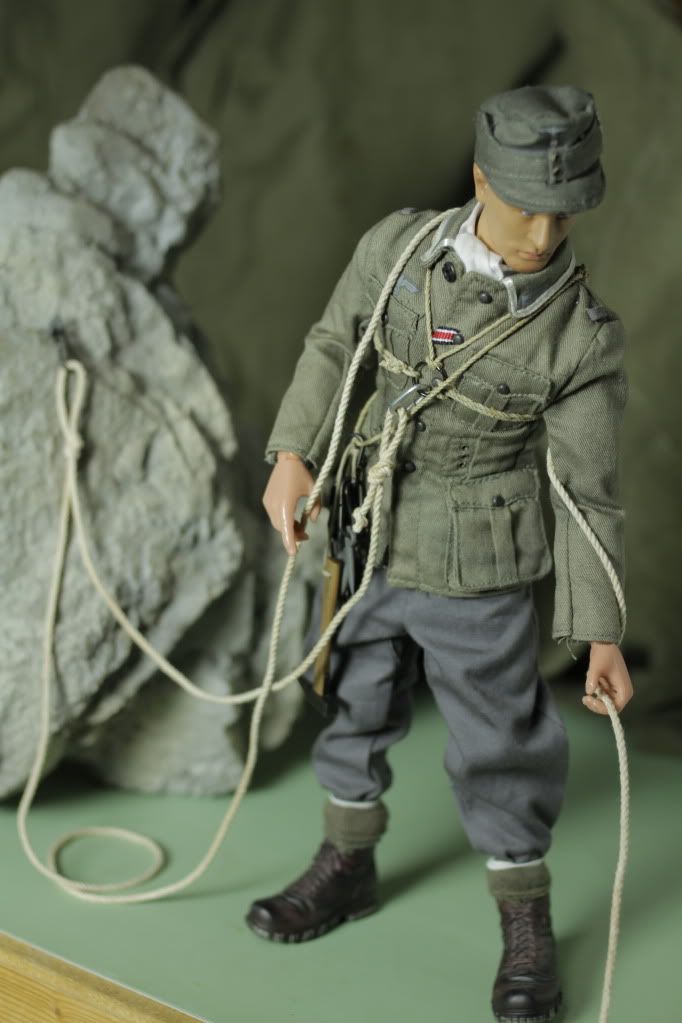
Slide the end of the rope under the shoulder sling...

GJ-Ropes_MG_0194.jpg


and tie off the end of the rope. This completes the "Jägerknoten mit Schulterschlinge." Now your Gebirgsjäger is ready to..."climb every mountain, follow every dream"...woops, dreaming of the Alps again!

GJ-Ropes_MG_0195.jpg


The next tutorial will show you how to set up a belay position.


Berg Heil und Horrido!

Patrick
5047826889_2d6c022aa2_z.jpg
 
Last edited:
Wow, excellent tutorial Patrick! Even I can understand it while I'll usually struggle to tie my shoe-laces....
 
Hi,

A superb tutorial Patrick, and hopefully even i should be able to follow it.
And cannot thank you enough, for the help that you have been giving to me.
Because i think i have got to the stage, where my figure could possibly be a bondage victim...

Gary
 
Grüß Gott Gebirglers (mountain dwellers),

Herzliches Willkommen zu unserem Hochgebirgsausbildung! A warm welcome to our high alpine training!

bergenpg174.jpg
bergenpg167.jpg


Next up on our schedule is how to set up a top belay position. But first, here's a little info from Wikipedia on "Lead Climbing:"

In lead climbing, one person, called the "leader", will climb from the ground up with rope directly attached to his or her harness (and not through a top anchor) while the other, called the "second", "belays" the leader by feeding out enough rope to allow upward progression without undue slack. As the leader progresses, he clips the rope through intermediate points of protection such as active cams, or passive protection such as nuts [In the 1940's only pitons were used as protection]. The leader also may clip into pre-drilled bolts; this limits the length of a potential fall.
Because the climbing rope is of a fixed length, the leader can only climb a certain distance. Thus longer routes are broken up into several "pitches"; this is called "multi-pitching". At the top of a pitch, the "leader" sets up an anchor and then belays the "second" up to the anchor; as the "second" follows the route taken by the "leader" she removes the equipment placed along the way in order to use it again on the next "pitch." Once both are at the anchor, the "leader" begins climbing the next pitch and so on until the top is reached.
In either case, upon completion of a route, climbers can walk back down (if an alternate descent path exists) or rappel (abseil) down with the rope.


So, the leader has made it to the first pitch. Now, he sets up an anchor point to belay the "second." First, he measures out an arm span of rope...

GJ-Ropes_MG_0197.jpg


...and gathers a loop in his left hand.

GJ-Ropes_MG_0198.jpg
GJ-Ropes_MG_0199.jpg


Then he ties a "figure 8" knot to fix the loop.

GJ-Ropes_MG_0200.jpg
GJ-Ropes_MG_0201.jpg


Now the rope is ready to be clipped into the anchor point...

GJ-Ropes_MG_0202.jpg


Which is usually a piton and a carabiner placed into the rock behind the leader.

GJ-Ropes_MG_0203.jpg
GJ-Ropes_MG_0206.jpg


With his anchor set, the leader can belay the second...

GJ-Ropes_MG_0205.jpg
GJ-Ropes_MG_0209.jpg

GJ-Ropes_MG_0210.jpg


In our next training session, we'll learn how to tie some other types of rope harnesses.


Berg Heil und Horrido!

Patrick

sdc11410.jpg
 
Hi,

Patrick you have answered so many of my questions with this superb tutorial.
And suddenly everything has become clear to me now.

Many many thanks.

Gary
 
Servus Jäger Gary und Bergkameraden,

Glad to be of help. I can't wait to see your final rendition of the photograph of Heeresbergführer Peter "Himalaya" Achenbrenner 'on-belay.'

For today's high alpine training segment, we'll look at how to make a ring-harness.

ProjEdel_004.jpg


The ring-harness was usually used for rappelling, but could also be used for climbing. It is made with a steel ring and climbing rope, or what the Germans call "Reepschnur" (smaller cord or rope...6 to 8mm in diameter). Reepschnur is also used to make slings and other safety lines.

Gary has an excellent tutorial on the finer details of making this harness at his website.

First, attach two lengths of Reepschnur to the metal ring...I found some nice 'chain-mail' rings in various sizes at Michaels Craft Store in the "Beads" section.

_MG_0217.jpg


The top cord goes around the neck and the side cord goes around the chest. Make sure to thread the side cord through the top loop in the back of the figure.

_MG_0219.jpg
_MG_0220.jpg


The 'Reepschnur' is also handy for making slings like this one to hang pitons and carabiners off of.

_MG_0223.jpg


To set up a 'Belay' position with this harness, take the end of the 'Hauptseil,' or main climbing rope, and tie a loop.

_MG_0225.jpg


Then draw out an arm span of rope and tie another loop.

_MG_0226.jpg


Now take the first loop, clip a carabiner to it, and then clip the carabiner to the metal ring of the harness.

_MG_0228.jpg
_MG_0229.jpg


To set up your anchor with a piton and carabiner, hammer the piton into a suitable crack in the rock, then clip the second loop into the carabiner.

_MG_0236.jpg
_MG_0237.jpg
_MG_0240.jpg
_MG_0242.jpg
_MG_0243.jpg


The lead climber now ready to belay the second climber.

_MG_0246.jpg
_MG_0247.jpg
_MG_0245.jpg


Berg Heil!

newgjbook03wp7.jpg


Patrick
 
Hi,

Once again Patrick you make it all look so easy, and a superb tutorial.

Many thanks.

Gary
 
This is great stuff.

Patrick, I'm attempting a string of 6 gbs in glacier traverse mode, crampons, axes, etc, plus combat gear. The picture of you and your mates makes is a good guide for me, as does the chest rig drawing. A couple of questions for you:

1) What's a good distance for separation in roped travel?
2) Is six too many for one group; should I split it into 2 groups of 3?
3) In the pic of your buddies, it looks like the rope travels through the ring, and perhaps over the shoulder of each man. I'd have thought that you'd just clip a 'biner to the ring and pass the rope through that, but I'm just guessing. What was the usual approach?
4) What's your source for the rings and 'biners? The 'biners that come with the figs are, in a word, crap. The one on your mans chest rig is nicer than the standard stuff...and is the chest rig secured with square knots, or something else?

Thanks for any assistance!
 
Back
Top